How Do You Disable Avatar Frontiers of Pandora's Denoiser?
You can usually disable the denoiser in Avatar: Frontiers of Pandora by editing the graphics config, but treat it as an image-quality test rather than a guaranteed upgrade. The first thing to check is whether reflections look too soft on your setup; if they already look stable and clean, the default setting may be better.
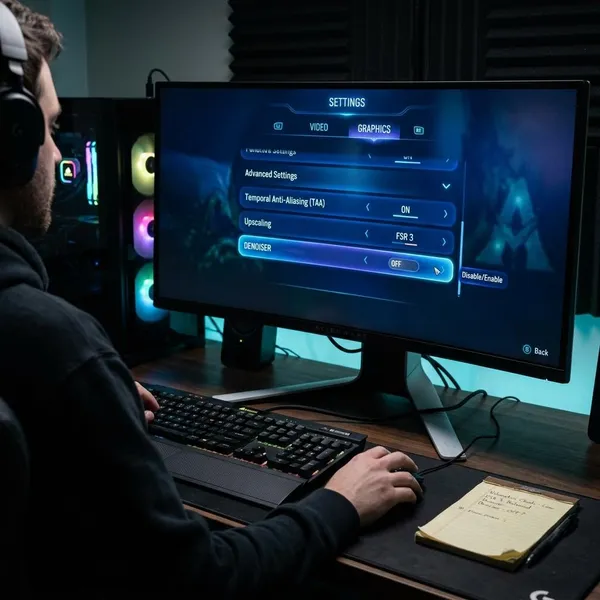
How to disable the denoiser in Avatar Frontiers of Pandora
The safest method is to close the game, back up the active graphics config, change only the specular denoiser value, and test the same scene before and after. Do not change DLSS mode, ray tracing quality, sharpening, or resolution during the first comparison, or you will not know what actually caused the visual change.
Close the game
Exit the game completely before editing the file. If it is still running in the background, it may rewrite the config when it closes and remove your manual change.
Give the launcher a few seconds to finish syncing or saving settings. If you have had config changes reset before, closing Ubisoft Connect as well can make the test cleaner.
Back up the graphics config
Make a copy of the graphics settings file before changing anything. Rename the copy clearly, such as graphics_backup.cfg or graphics_original.ini, depending on the file type you find.
Open the AFOP config folder
The config folder can vary by install and launcher behavior, so avoid relying on one exact path unless you already know it on your PC. Start by checking common user settings locations such as Documents, My Games, Ubisoft-related folders, or AppData.
If several folders look possible, use a practical check: change one harmless graphics option in the game, close it, then sort likely config folders by "Date modified." The file updated most recently is usually the active one.
Open the graphics settings file
Open the likely graphics or renderer settings file in a plain text editor such as Notepad. Avoid word processors or editors that may add formatting.
- Use the file that clearly relates to graphics, rendering, or display settings.
- Do not edit several files at once.
- Keep the original file name and extension unchanged.
Find the specular denoiser setting
Use search inside the file and look for terms such as specular, denoiser, reflection, or similar rendering labels. The exact wording may differ by version, so check nearby ray tracing and reflection lines before changing anything.
If you only find a broad denoiser-looking entry and cannot tell whether it is specular-related, pause before editing. Changing the wrong post-processing value may make no visible difference and can waste time during testing.
Disable the setting and save
Change only the denoiser value. Depending on the file format, that may mean switching true to false, 1 to 0, or on to off. Do not rename the setting or remove punctuation around it.
- Change the denoiser value only.
- Save the file.
- Close and reopen the file to confirm the value stayed changed.
- Launch the game without changing other graphics settings first.
If the value reverts before you even launch the game, you may be editing the wrong file, a synced file, or a protected location.
Restart the game and test it
Test in a scene you can repeat: the same location, same time of day if possible, same camera angle, and same graphics settings. Water, glass, wet ground, polished surfaces, and metal are usually the easiest places to judge specular reflection changes.
A player checking screenshots on a sharp 1440p or 4K display may notice extra detail right away. Someone playing normally with DLSS Performance mode may care more about shimmer during movement than about a sharper still frame. Test both ways before deciding.
Why players disable the specular denoiser
Most players try this tweak because reflections can look overly filtered on some setups. A denoiser is meant to clean noisy ray-traced information, but that cleanup can sometimes blur small highlights or make glossy surfaces look too smooth.
Reduce overly smooth reflections
If puddles, glass, or wet surfaces look creamy instead of detailed, the specular denoiser is one possible cause. Disabling it lets you check whether the softness comes from that filter or from another setting such as DLSS, render scale, or sharpening.
Restore detail in reflective surfaces
Small reflected shapes can blur together when denoising is aggressive. Turning the setting off may bring back sharper edges in windows, water, glossy floors, or metal trim.
Test different DLSS results
DLSS can change how reflections feel because it affects internal resolution, temporal stability, and reconstruction. A denoiser setting that looks acceptable with DLSS Quality may look noisier with Balanced or Performance.
- First test denoiser on versus off with the same DLSS mode.
- Then test another DLSS mode if needed.
- Avoid judging from a scene with different lighting or weather.
Compare clarity with the default setting
The default setting may still be the better choice if you prefer stable reflections during normal exploration. The tweak is worth keeping only if the extra clarity is visible without adding distracting sparkle or crawling noise.
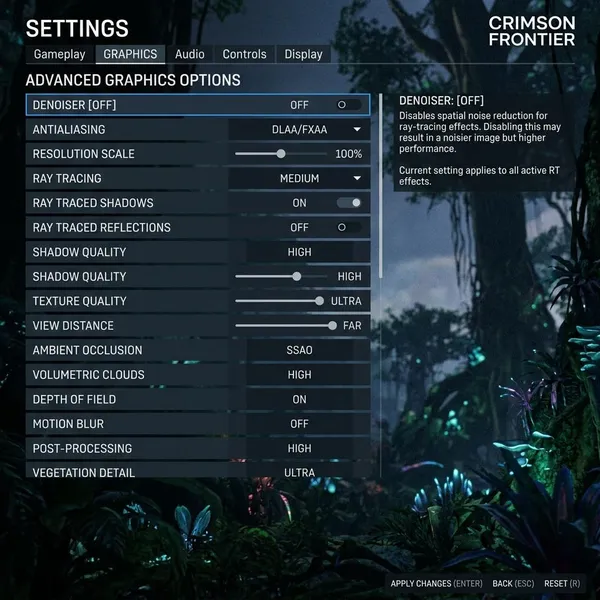
What changes with the denoiser off
With the denoiser off, the image usually shifts from smoother reflections toward more raw reflection detail. That can make some surfaces look clearer, but it can also reveal the noise the denoiser was hiding.
Reflections may look sharper
Reflected edges, small highlights, and shiny surface detail may look more defined. This is most noticeable when you stand still or move the camera slowly near water, glass, or wet materials.
Fine detail may be more visible
Fine reflection detail can survive better without extra filtering. If your main complaint is that reflective surfaces look smeared compared with the rest of the scene, this is the change you are looking for.
Do not judge only from photo mode or a still screenshot. A sharper image that becomes unstable during ordinary movement may not be worth using long term.
Noise or shimmer may increase
The main downside is extra noise. You may see flickering highlights, grainy reflections, or shimmer that becomes more obvious when the camera moves.
Results may vary by scene and settings
There is no single best answer for every setup. A bright riverbank may look cleaner with the denoiser off, while a rainy or low-light scene may become too restless.
If you are only taking comparison screenshots, sharper reflections may be the priority. If you are playing for hours, stable motion usually matters more than maximum still-frame detail.
What to do if the denoiser setting does not work
If nothing changes, assume a simple cause first: the wrong file was edited, the value did not save, or the game rebuilt the config after launch. Work through those checks before trying more aggressive fixes such as making the file read-only.
Check that you edited the correct file
Look for multiple graphics or settings files, especially if the game has been updated, reinstalled, or synced through the launcher. Editing an old config is a common reason the tweak appears to do nothing.
Confirm the new value was saved
After saving, reopen the file before launching the game. If the value is already back to its original state, the edit did not stick.
- Check that the file is not read-only before editing.
- Make sure your text editor saved the same file, not a copy.
- Confirm you have permission to write in that folder.
Recheck the setting after changing graphics options
Some graphics-menu changes may cause the game to rewrite parts of the config. DLSS mode, ray tracing options, quality presets, and display changes are the kinds of settings worth checking after.
If the denoiser value resets every time you adjust graphics, set up the rest of your graphics options first, close the game, then apply the denoiser edit last. Making the file read-only can help in some cases, but it may also stop normal settings changes from saving.
Restore the backup and try again
If the image looks worse or the file becomes confusing, restore your backup instead of guessing. Close the game, replace the edited file with the untouched copy, and confirm the game launches normally before testing again.
When you retry, change only the denoiser line. If the second test still does nothing, the current game version or config path may not support the tweak in the way you expected.
Conclusion
Disabling the specular denoiser is worth testing if reflections in Avatar: Frontiers of Pandora look smeared, but it is not automatically the better setting. Back up the config, compare the same scene with identical graphics options, and keep the change only if the added clarity is still comfortable during real gameplay.