Which Apple Photo Editor Is Right for You?
If you want an apple photo editor, start with Apple Photos unless you already know you need layers, advanced RAW control, or design tools. It is free, already on iPhone, iPad, and Mac, and it handles the edits most people make every week: crop, straighten, fix lighting, improve color, and clean up small distractions on supported devices.
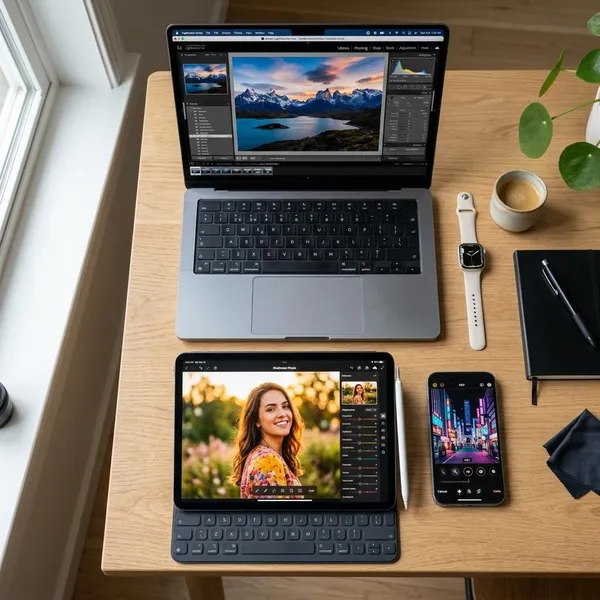
Which Apple photo editor fits your needs?
The easiest way to choose is to look at what usually happens after you open a photo. If you only want a picture to look better before sending it to family or posting it, Apple Photos is enough. If you spend time recovering detail, matching colors, or working with RAW files, Photomator is the more sensible upgrade. If the photo becomes part of a poster, thumbnail, presentation, or social graphic, Pixelmator Pro fits better.
| Use case | Best fit | Why it makes sense |
|---|---|---|
| Quick fixes from your photo library | Apple Photos | Fast, free, synced, and simple enough for everyday editing |
| More careful photo adjustment | Photomator | Better control for RAW, color, selective edits, and finer image tuning |
| Photos mixed with text, shapes, or layers | Pixelmator Pro | Built for Mac-based design work, compositing, and finished visuals |
What can you edit in Apple Photos?
Apple Photos covers the basic editing stack most people actually use: composition, light, color, detail, and simple finishing effects. The safest order is to fix the frame first, then the lighting, then the color, and only then add sharpness or filters. That order prevents a common mistake: making a photo look dramatic before the main problem has been fixed.
Crop, rotation, and perspective
Crop is often the highest-impact edit in Apple Photos. Use it to remove distractions, tighten the subject, or change the shape of the image for sharing. Straighten before you fine-tune color, especially if the horizon, table edge, wall, or document line is visibly slanted.
Perspective controls are helpful for buildings, rooms, shelves, documents, and whiteboards. Do not overcorrect every line until the image looks stretched; the goal is a cleaner photo, not a technical drawing.
Exposure, highlights, and shadows
Exposure changes the overall brightness, while highlights and shadows help with problem areas. If faces are too dark but the sky is already bright, raising exposure alone may make the sky worse. In that case, lift shadows carefully and reduce highlights only as much as needed.
Color, contrast, and saturation
Color edits should usually be small. Warmth can fix a yellow indoor photo or a cold blue shadow, while tint helps when the image looks slightly green or magenta. Saturation and vibrancy can make a flat scene feel more alive, but pushing them too far makes skin, grass, and food look artificial.
- Portraits: protect natural skin tone before chasing stronger color.
- Food photos: add warmth gently, but avoid orange-looking whites.
- Travel shots: use contrast and vibrancy before reaching for a heavy filter.
Sharpness, detail, and noise
Sharpness and definition are finishing tools, not rescue tools. They can make text, hair, leaves, and edges look clearer, but they cannot truly fix motion blur or a badly missed focus.
Noise reduction helps with grainy low-light photos, especially in darker backgrounds. Use it lightly, because too much smoothing can make faces, fabric, and small details look waxy.
Filters and finishing effects
Filters are useful when you want a quick mood change, but they should not hide basic problems. A photo that is too dark, crooked, or overly yellow will usually look better if you correct those issues before adding a filter.
A subtle vignette can help draw attention toward the center, especially for portraits, food, and close-up subjects. If the corners look obviously dark, it has probably gone too far.
How to edit photos on iPhone, iPad, and Mac
The editing flow is similar across iPhone, iPad, and Mac, even though the controls appear in slightly different places. A simple routine works best: open the photo, fix the crop, balance light and color, compare with the original, then save. You do not need to touch every slider to get a better image.
Open your photo and choose Edit
Open the picture in Photos and choose Edit. On iPhone and iPad, this is usually a tap from the photo view. On Mac, open the image and click Edit.
Crop and straighten the image
Start with the crop because composition changes how every later edit feels. Remove clutter at the edges, straighten obvious lines, and choose a frame that keeps attention on the subject.
For a quick social post, a tighter crop may make the image stronger on a small screen. For a family photo you want to keep long term, be more careful before cutting out background context that may matter later.
Adjust light and color
Work from the biggest problem to the smallest one. First fix brightness, then recover highlights or shadows, then adjust warmth, tint, contrast, vibrancy, or saturation.
- Set overall brightness: make the subject easy to see without blowing out bright areas.
- Recover difficult areas: lower highlights for harsh skies or windows; lift shadows for dark faces or rooms.
- Correct color casts: use warmth and tint before increasing saturation.
- Add depth carefully: use contrast after the photo already looks balanced.
Refine details and compare with the original
After the main edit is done, add a little sharpness, definition, or noise reduction if the photo needs it. Compare with the original before saving; this is the easiest way to catch an edit that has become too bright, too colorful, or too crisp.
On many Apple devices, you can press and hold to view the original while editing. If the edited version only looks better because it is more intense, not because it is clearer or more natural, pull it back.
Save your changes
Choose Done to save the edit. Apple Photos saves edits non-destructively, so the original normally remains available underneath your changes.
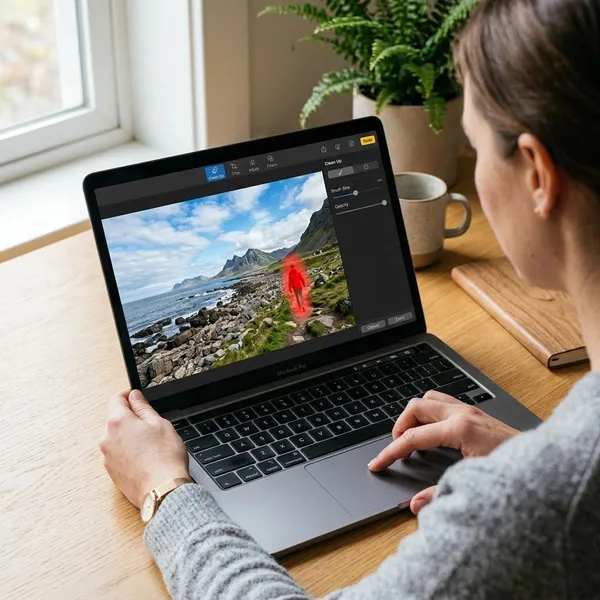
How to remove objects with Apple Photos Clean Up
Clean Up is Apple's built-in option for removing unwanted objects from supported photos. It is best for small distractions on simple backgrounds: a cup on a table, litter on pavement, a small sign near the edge, or a passerby in the distance. It is less reliable when the object overlaps hair, hands, faces, fences, text, or complex patterns.
Check device and regional support
Before looking for the tool, check whether your device, software version, language, and region support Apple's Clean Up feature. Availability can vary, especially for Apple Intelligence features, so the option may simply not appear on some devices.
If you cannot find it after updating, check Apple's current support information rather than changing random settings. That saves time and avoids assuming the Photos app is broken.
Open Clean Up in the editing tools
Open the photo, choose Edit, and look for Clean Up in the editing controls. Keeping it inside Photos is the main advantage: you can remove one distraction without exporting to another app.
Use it after basic crop and light adjustments if the object is near an edge or in a shadow. A better crop may remove the distraction more cleanly than AI retouching.
Tap or brush over the unwanted object
Zoom in and mark only the object you want removed. Smaller, more precise selections usually give the tool less to rebuild and can create a cleaner result.
- Good candidates: small objects, plain walls, simple pavement, empty sky, uncluttered tables.
- Risky candidates: faces, fingers, hair, logos, fences, patterned fabric, repeated tiles.
- Better approach: try two small passes instead of one large brush stroke.
Review the result and save
Always inspect the edited area before saving. Look for smears, warped edges, repeated textures, or a patch that looks cleaner than the rest of the photo.
Then zoom back out and judge the whole image. A tiny flaw may not matter in a casual message, but it may be too obvious for a printed photo, portfolio image, or product listing. Save it when the result looks natural at the size where people will actually view it.
Conclusion
Apple Photos is the right place to begin because it removes the most common photo problems with the least friction. Move to Photomator when you want deeper control over the image itself, and choose Pixelmator Pro when the photo becomes part of a layered design. The practical test is simple: if Photos fixes the problem in a minute, stay there; if you keep fighting its limits, upgrade for that specific workflow.